Google
 

how to turn two columns into three columns in your template

if you have a lot of widgets in your blog.probably you hope to change your two-column blog into three-column.here is a method,of course different
blog has differnt conditon,you can change according to your blog's condition.but remember save your template before changing your template.
1.in our blogger we control our page through the following three parts:
#outer-wrapper -define the entire page
#main-wrapper - define the article part
#sidebar-wrapper - define the sidebar part
2.now we add an column,we need define the second sidebar-wrapper.we name the wrapper the left sidebar-wrapper.cause most of the settings are the same,so we only need to copy and paste sidebar-wrapper,then modifying a little is enough.
3.we need to make sure the width of each column. my recommendation is outer-wrapper:860px,main-wrapper:400px,two sidebar-wrappers:each220px.make sure outer>main+sidebar*2.
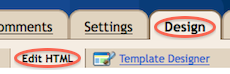
4.modify CSS,check the "expand widget templates".finding out the corresponding place to change in your template.following is an example.if you need to adjust the interval between the the page and margin please fine-tune the corresponding margin value.we control the displaying of different sidebar position through "float".and if you want to let your two sidebar displayed in the same side.you need to adjust the both on the same left or right.

#outer-wrapper {
width: 860px;
...
}
#main-wrapper {
width: 400px;
...
}
#sidebar-wrapper {
width: 220px;
float: right;
...
}
#leftsidebar-wrapper {
width: 220px;
float: left;
...
}
5.after defining css,we need to define one leftsidebar part again,
now close up the "expand widget templates",about in the lowest 
part you will see the code as follows,adding the red part

<div id='leftsidebar-wrapper'> 
<b:section class='sidebar' id='leftsidebar' preferred='yes'>

<div id='main-wrapper'>
<b:section class='main' id='main' showaddelement='no'>
<b:widget id='Blog1' locked='false' title='Blog Posts' type='Blog'/>
</b:section>
</div>

        
the followingis the result before modifying:

setting up the picasa album

i create a picasa album just now,title:dsektop;date:9/25/08;description:the images used in my blog:http://tourbeau.blogspot.com ;the album will be visible in the picasa online album http://picasaweb.google.com/livefor9.and on the Picasa Web Albums community you can look for my album,and we can modify the community search preferences on the Settings page.
after creating,we can upload five images once,
can upload freely
when successfully uploaded,can add caption for your picture or you can post a comment for my image.when editing online,you can magnify our view or rotate the image.
http://tourbeau.blogspot.com welcome to link all my articles,thanks

rss,xml,atom--feed introduction

when you see the icon like this from my blog:
or 
from feedburner,you may wonder what is this about.this is the rss subscription icon,when you want to keep track of my blog to stay informed to the articles of my blog or other blogs,just click the icon and choose freely one reader,the main function of subscribing is saving time by not visiting every site manually,you can read your favorite blogs in one reader,this is just like you can read various information in one paper,but more conveniently the "reader" paper can change in time,this is what is called rss(really simple syndication or rich site summary),so when we subscribe the information we like,we are always in the condition of syndicating,not just in time.but in fact as a simple reader you don't need to know the accurate meaning of rss,xml,or atom meaning-like word.you only need to know this is a tool of getting information conveniently,but if you want to be an internet expert,accuracy is the life of expert,you need to know all related knowledge.

http://tourbeau.blogspot.com welcome to link all my articles,thanks

the best function of mobile phone

when you see something in the store window,you want to know the price but don't want to ask,in the condition,you can use your phone's GPS and compass funtion to find your need,so not only the accurate position but also related item,so the funtion is amazingly functional,this can save time.

the process of signing up "slide"

1.the reason joining the site:if you want to express thought through picture.share images between friends,or make your own slide shows,the slide site is a very good place
3.click "sign up"
4.in the "join slide here"part enter your email and password and clikc "sign up"
5.can customize by your own
6.upload the image you like

7.and in the right part you can "add cool effect"

this is the process

the process of registering spicypage

1.the url:
2.signup at spicypage 
20 click save and publish
21
 
22. success.
this is the process. 

the two factors affecting pr

1.the content

2.the link

the method of adding comment part in blogger

1.click any post,in the lower part look for "Subscribe to: Post Comments (Atom)" click and appear the post comments page,copy the feed address except the number part.
for example:i click one of my url:
http://tourbeau.blogspot.com/feeds/9085363482909303457/comments/default
after deleting the number part,the correct url is: 
http://tourbeau.blogspot.com/feeds/comments/default2.enter the dashboard of blogger,click "layout"

3.click "add a gadget"

4.look for the "feed" icon.

5.click to enter the feed url copied just now:
http://tourbeau.blogspot.com/feeds/comments/default6.click "continue"

7.customize the appeared page:include how many items to appear in the sidebar,item dates,item sources.

8.click "save"

9.then back to the "layout" page to rearrange the gadget anywhere you will

this is the process.


intensedebate--a very good comment system

i recommend a very good widget-intensedebate
a very good cemment system,the url:  http://www.intensedebate.com/
1.click "sign up"to enter the registration page,enter your username,email,password,confirm password,then click "sign up".
2.then enter the second step,in this procedure if you have any feedback you can click "feedback".
3.Enter the URL of your blog or website and click 'Next'!
4.then appear the page:


    1. Which blog posts should have IntenseDebate comments enabled?
       
      i check the second box"on all blog posts"
    2. Clicking the link below opens Blogger.com in the panel to the right to continue the installation.


    Template Install

    1. If you aren't already logged in on the Blogger website, do so now. You should be in the Blogger dashboard - under "Manage Your Blogs".
      Locate the blog where you wish to install IntenseDebate and find the options under "Manage". It should look like this:
      Screenshot
      Click "Layout".


      Please Note: If the options under "Manage" are "Post, Settings, Template" then you are using Blogger Classic, which is currently unsupported.
    2. Select Edit HTML in the sub-menu at the top.
      Screenshot
    3. Click "Download Full Template" and save the file somewhere convenient.
      Screenshot
    4. Select the file on your harddrive by clicking "Browse" below:


      Template Install

      1. Click once in the textfield above to select the converted HTML, then right-click to copy.
      2. Make sure all the text is selected in the Edit Template text box (see screenshot). You can press CTRL+A (Command+A on a Mac) to select all text.
        Screenshot
        Now paste the text you just copied! (Right-click in the field.)


      3. Click "Save Template".
        Screenshot
      Congratulations! You have installed Intense Debate on your Blogger blog. Here's what you can do now:

      this is the process.

do you like tennis--who can win in the usopen semifinal and final-nadal,murry,or federal

now i am paying close attention to The US Open--great tennis  event.do you like tennis?tell me your opinion,i regard Murray will win in the current semifinal,and in the final Federer will win.

google chrome--faster and safer browser

here i recommend a brower,this is really a faster and safer browser i have ever used,before this i used many browers,this google chrome is faster,of course,i also use flock,ie,firefox,opera,safari etc.
now recommend the process of downloading and using.

if you have any question or comment about google chrome,you can ask from here.
google chrome group
download google chrome from the address below
http://www.google.com/chrome
recommend strongly download from the address,if not you will have limited functionality

1.click "download google chrome"
check the box"Optional: Help make Google Chrome better by automatically sending usage statistics and crash reports to Google."
then click "accept and install"

2.the procedure of installing should complete in seconds and the browser will start automatically.if you have trouble with the download,click"click here"

3.just before the installation was complete,the welcome page will appear:
google chrome will do these two tasks:
Ⅰ.import bookmarks,passwords,and other settings from microsoft internet explorer.(but if you use firefox,you can import settings from mozilla firefox by clicking "customize these settings")
Ⅱ.add google chrome shortcuts to your desktop,quick launch bar,and start menu.

then proceed.

this is the simple process.


Share/Save/Bookmark