the quick edit pencil after every post is very important,sometimes the quick edit link after your post may not appear for some reason,use the following method quick edit pencil can reappear:
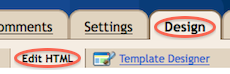
go to template-edit html-refer to the following part
<div id='main-wrapper'>
<b:section class='main' id='main' showaddelement='no'>
<b:widget id='Blog1' locked='true' title='Blog Posts' type='Blog'/>
</div>
or something like this.
first cut this part.
then save the template.
then paste the code to the original place.
then the quick edit will appear.
but when i paste the code to the original place.lost the linklist and intense debate widgets,so just restore.this process can restore time,in my opinion the quick edit link is the quickest.
friendconnect-online social society
add an gadget in the left side:

when you have personal website or blog,you want to increase your traffic but meanwhile you want to have your own online society,google friend connect is a very good gadget for the feature,of course also have other many features,really a very very good gadget now providing for nearly all the websites,your users can visit and join your website more easily.really good.ok now just use the really good function to set up your better and better site.
webring- a very good social networking place
the url:webring
click sign up

then if you have a website click "i have a website"
enter your blog url
appear the following information:
Drive more people to your web site
Congratulations, you are just about finished joining a WebRing community.
Your WebRing account has been created and we've sent you an account activation email containing your account ID and password. You are logged into your account now, so you can configure your account using the My Account link at the top of this page. You can create a blog if you wish, search for a ring community to join, and more!
then return to your email and verify your account through clicking your link
Signing Up
Step 3: Choose your membership
Congratulations! You've successfully acquired your user ID and
password, verified your email address, and are almost done with the
sign-up process. Now, you can choose your membership level.
WebRing offers two types of membership options. Both allow you to join and create WebRing Communities.
- WebRing 2.0 Membership —
This membership plan is new and offers the latest WebRing Management
Tools to both Community Members and Managers for $36 per year.
WebRing 2.0 Member Benefits
- Receive turn key assistance to connect your web site to your selected WebRing Communities with our Get Started Program.
- Get a free WebRing 2.0 Email account with enhanced spam and virus protection.
- Use WebRing Chat and add a chat room to your communities.
- Earn money from communities you manage.
- Use expanded customization options to create a unique look for your community.
- Gain access to additional web traffic tracking tools.
- Ensure your web site appears near the top of the WebRing Search Ranking.
- Receive personal and priority support.
- Drive highly targeted people to your web site.
Coming soon:
- Gain access to one-to-one and one-to-many communication tools to share information and do business.
- Have your own WebRing.com email address.
- Gain access to additional web traffic tracking tools.
- and more...
WebRing 2.0 Community Manager Benefits
- Create your own WebRing Community. Build a niche community using the latest WebRing Management Tools.
- Control the look and feel of your WebRing Community. Personalize community settings, choose the WebRing NavBar you like best and categorize your community in the WebRing Directory to direct appropriate visitors to your community.
- Manage the content of your WebRing Community. Invite others to join, approve or deny new sites as community members, alert community members of changes and more
- Earn a small income through your WebRing Community through site prioritization and advertising. Offer to place Community Member's sites higher on your hub page listing for a small fee, as well as advertise other communities or domains.
WebRing 1.0 Membership — This is the original membership option and is free to everyone. It allows you to both join and create WebRing Communities. Check out our new turn key Get Started Program.
WebRing 1.0 Member Benefits
- No annual fee.
- Join WebRing Communities.
- Improve your search ranking with mainstream search engines.
- Drive more people to your web site.
WebRing 1.0 Community Manager Benefits
- Create one or more WebRing Communities
- Choose the name of your Community
- Select your Community Members
i choose the second
after clicking "choose this option now" of the second choice.

and if you have already added your site,there will appear the following information:
The URL you entered id already on file. You can use
it when applying to join Ring Communities already. If you have another
URL you can enter that one.
this is certainly a good method to increase your traffic
flock upgrade
just now flock upgrades to flock2.0,flock is one of my favorite browsers,i like the functions just added,if you use flock and not choose auto-updated,click "help"section of toolbar,then click "check for updates",flock updates perfectly,here is the release notes.using several kinds of browsers the same time add more interests of browsing experience.
translate gadget--one of the most useful gadgets till now
1.the url:http://translate.google.com/translate_tools?hl=en
2.choose the language of your blog
3.paste the code into the blog
4.recommend also add the url address to the bookmark cause when you click the url i recommend you will find in the middle of the page there are many languages you can use to translate webpage directly when you click the language icon dragged into the browser's toolbar,these two functions combined with the two translation functions in the toolbar i have recommended before and the http://translate.google.com/translate_t#,
http://translate.google.com/translate_s?hl=en,http://www.google.com/dictionary?hl=en come into being the all-round of translation.
5.beautiful gadgets
my favorite keywords of life
ardor,passion,kindness,love,simplicity,standard,persistence,study,
live and earn,learning from anybody,i am a leader and meanwhile i am the pursuer of the truth of beauty.i will add my life keywords continuously,attention:don't confuse my keywords with the seo keywords,of course i will gradually add my life keywords to my internet keywords,seo our internet,seo our life.seo every beautiful thing.i think this article will be the longest article in my life,longer and longer,of course this article will be my favorite article.
live and earn,learning from anybody,i am a leader and meanwhile i am the pursuer of the truth of beauty.i will add my life keywords continuously,attention:don't confuse my keywords with the seo keywords,of course i will gradually add my life keywords to my internet keywords,seo our internet,seo our life.seo every beautiful thing.i think this article will be the longest article in my life,longer and longer,of course this article will be my favorite article.
kaleidoscope of life -- squidoo lens
"share your knowledge.make a difference"--great slogan,when you share your knowledge,your knowledge will increase,when your knowledge increases your will make a difference.when you make a difference you will share.this is the vital recycling of the knowledge spread.the very important factor i value very much about this site is that every lens is a specified aspect of life.more specified,every specified aspect make into being the general.simply,very perfect site worth recommending.
when you firstly sign in,here is the process:
1.enter the url:http://www.squidoo.com
2.start the step 1 of the registration
enter your information:first name,last name,your email,retype your email,desired username,password,retype password,word verification.check the box"
meanwhile check the two sections:"lens of the day newsletter"and "squidu weekly tools and tips"
3. enter the step 2 of the procedure:

4. click "create a lens" to enter the step 1 of your lens basic information page:
on the "my page is about" section enter keyword that best describes your page.then name your title in the "give it a title" section.and "pick the best category for your page".
when you choose one of categories,according template choices named"starter packages"based on your category choice will appear below the category section,there are two choices,just pick one you like.then click "continue"to enter the step 2
5.the page of step 2 will ask you a few questions about your page,this will help you load your page with your great content.
including sever aspects below:
tell the world about the topic you enter in step 1,be passionate and don't hold back.
"a little about me"section enter your information.
"a blog worth reading" section of course enter your personal blog,click"preview"and you will see the latest posts of your blog.attention:the sample of preview section is the result that will be displayed on your page.when your page is viewed each time,the latest posts of your blog feed will show up
in the "now tell the world what you think of this blog"section ,just show to the world how great your blog is.
in the "google feed"(about the title you write as mentioned before)secion,just write the reason.
then check the box "allow people to add comments to my page"
click "continue" to enter the step 3,otherwise if you encounter any technic problem,just click the "help,i am stuck"section in the upper left hand of the page.
6.the step 3 is like this

7 click the "turbo it"or "publish my page now" on the upper right section,recommend click "turbo it"section,then you will be directed to the page about the pictures of your topic,just choose one picture and add your comments and p.s. below the picture.click "continue" to "publish now"
8.when you click "publish now"there will remind that "So you're ready to publish your page?",and again you will be asked a few questions about your page,including ""title your page"(if you are not content with your title before you can change this),then "creat your page url",and "content rating"about your page,certainly the better the better.
9.then click"go publish"
lens--beautiful page
about the translation function of the current google toolbar version: very convenient
1.google toolbar downloading address: the current version
2

3.now introduce a very convenient translation function,certainly the function of each part is very useful,i will introduce continuously:
when you want to translate non-english web pages into english,just click the toolbar's translate menu to choose "translate page into english",but if you want to translate from english,just enable"eordtranslator",then just hover the mouse cursor over an english word to look at the translation meaning.otherwise,in the default condition,when you click the translation menu,this will enable wordtranslator.click again,it will return to the original condition.and about the language you want to translate into you can choose as following process:
1).click the wretch icon

2).click "tools" in the "google toolbar options" pop-up window
3).choose the "tranlate" checkbox

4).click "edit" button to choose the language you want to translate into in the drop-down menu.
5).click "save"
very good translation function,very convenient.
how to turn two columns into three columns in your template
if you have a lot of widgets in your blog.probably you hope to change your two-column blog into three-column.here is a method,of course different
blog has differnt conditon,you can change according to your blog's condition.but remember save your template before changing your template.
1.in our blogger we control our page through the following three parts:
#outer-wrapper -define the entire page
#main-wrapper - define the article part
#sidebar-wrapper - define the sidebar part
2.now we add an column,we need define the second sidebar-wrapper.we name the wrapper the left sidebar-wrapper.cause most of the settings are the same,so we only need to copy and paste sidebar-wrapper,then modifying a little is enough.
3.we need to make sure the width of each column. my recommendation is outer-wrapper:860px,main-wrapper:400px,two sidebar-wrappers:each220px.make sure outer>main+sidebar*2.
4.modify CSS,check the "expand widget templates".finding out the corresponding place to change in your template.following is an example.if you need to adjust the interval between the the page and margin please fine-tune the corresponding margin value.we control the displaying of different sidebar position through "float".and if you want to let your two sidebar displayed in the same side.you need to adjust the both on the same left or right.
#outer-wrapper {
width: 860px;
...
}
#main-wrapper {
width: 400px;
...
...
}
#main-wrapper {
width: 400px;
...
}
#sidebar-wrapper {
width: 220px;
float: right;
...
}
#leftsidebar-wrapper {
#sidebar-wrapper {
width: 220px;
float: right;
...
}
#leftsidebar-wrapper {
width: 220px;
float: left;
...
}
float: left;
...
}
5.after defining css,we need to define one leftsidebar part again,
now close up the "expand widget templates",about in the lowest
part you will see the code as follows,adding the red part
<div id='leftsidebar-wrapper'>
<b:section class='sidebar' id='leftsidebar' preferred='yes'>
<div id='main-wrapper'>
<b:section class='main' id='main' showaddelement='no'>
<b:widget id='Blog1' locked='false' title='Blog Posts' type='Blog'/>
</b:section>
</div>
<div id='main-wrapper'>
<b:section class='main' id='main' showaddelement='no'>
<b:widget id='Blog1' locked='false' title='Blog Posts' type='Blog'/>
</b:section>
</div>
the followingis the result before modifying:
 guess the result after modifying,smart:)
setting up the picasa album
i create a picasa album just now,title:dsektop;date:9/25/08;description:the images used in my blog:http://tourbeau.blogspot.com ;the album will be visible in the picasa online album http://picasaweb.google.com/livefor9.and on the Picasa Web Albums community you can look for my album,and we can modify the community search preferences on the Settings page.
after creating,we can upload five images once,

can upload freely
when successfully uploaded,can add caption for your picture or you can post a comment for my image.when editing online,you can magnify our view or rotate the image.
http://tourbeau.blogspot.com welcome to link all my articles,thanks
rss,xml,atom--feed introduction
when you see the icon like this from my blog:

or

from feedburner,you may wonder what is this about.this is the rss subscription icon,when you want to keep track of my blog to stay informed to the articles of my blog or other blogs,just click the icon and choose freely one reader,the main function of subscribing is saving time by not visiting every site manually,you can read your favorite blogs in one reader,this is just like you can read various information in one paper,but more conveniently the "reader" paper can change in time,this is what is called rss(really simple syndication or rich site summary),so when we subscribe the information we like,we are always in the condition of syndicating,not just in time.but in fact as a simple reader you don't need to know the accurate meaning of rss,xml,or atom meaning-like word.you only need to know this is a tool of getting information conveniently,but if you want to be an internet expert,accuracy is the life of expert,you need to know all related knowledge.
http://tourbeau.blogspot.com welcome to link all my articles,thanks
the best function of mobile phone
when you see something in the store window,you want to know the price but don't want to ask,in the condition,you can use your phone's GPS and compass funtion to find your need,so not only the accurate position but also related item,so the funtion is amazingly functional,this can save time.
the process of signing up "slide"
1.the reason joining the site:if you want to express thought through picture.share images between friends,or make your own slide shows,the slide site is a very good place
2.the url:http://www.slide.com/
3.click "sign up"
4.in the "join slide here"part enter your email and password and clikc "sign up"
5.can customize by your own
6.upload the image you like

7.and in the right part you can "add cool effect"
this is the process
the process of registering spicypage
1.the url:
2.
3.


I accept the Terms of Use of spicypage.
Please send me the latest news and updates.
4.enter the information
5. the click activate now in the appeared page
6.enter the activation code that you have received in the account activation email.
7.then in the letter as follows click the link
Welcome sky,
Thanks for signing up with spicypage! Please read this carefully to activate your account.
To activate your account click this link:
http://www.spicypage.com/
(If that doesn't work, copy the link, paste it into your browser, and hit "Enter/Return." Make sure you copy the whole link, as it may wrap over two lines.)
In case that does not work, you can always login into your account and activate your account from there.
8.after clicking the link appear the page
account activated successfully. you can contact any member now. have fun.
9.click continue
10.in the mainpage login the username just registered
11.click 
12

13 click save and continue
14 click get snapshot or you can upload your own snapshot of the site
15

16.the successful getting page then click accept and continue
17.
- Assign the site to proper categories
- Enter tags that best describe the site
18 click save and continue
19 appear the page

20 click save and publish
21

22. success.
this is the process.
the method of adding comment part in blogger
1.click any post,in the lower part look for "Subscribe to: Post Comments (Atom)" click and appear the post comments page,copy the feed address except the number part.
for example:i click one of my url:
http://tourbeau.blogspot.com/feeds/9085363482909303457/comments/default
after deleting the number part,the correct url is:
http://tourbeau.blogspot.com/feeds/comments/default2.enter the dashboard of blogger,click "layout"
3.click "add a gadget"
4.look for the "feed" icon.
5.click to enter the feed url copied just now:
http://tourbeau.blogspot.com/feeds/comments/default6.click "continue"
7.customize the appeared page:include how many items to appear in the sidebar,item dates,item sources.
8.click "save"
9.then back to the "layout" page to rearrange the gadget anywhere you will
this is the process.
intensedebate--a very good comment system
i recommend a very good widget-intensedebate
a very good cemment system,the url: http://www.intensedebate.com/
1.click "sign up"to enter the registration page,enter your username,email,password,confirm password,then click "sign up".
2.then enter the second step,in this procedure if you have any feedback you can click "feedback".
3.Enter the URL of your blog or website and click 'Next'!
4.then appear the page:
-
Which blog posts should have IntenseDebate comments enabled?
i check the second box"on all blog posts" - Clicking the link below opens Blogger.com in the panel to the right to continue the installation.
Template Install
- If you aren't already logged in on the Blogger website, do so now. You should be in the Blogger dashboard - under "Manage Your Blogs".
Locate the blog where you wish to install IntenseDebate and find the options under "Manage". It should look like this:

Click "Layout".
Please Note: If the options under "Manage" are "Post, Settings, Template" then you are using Blogger Classic, which is currently unsupported. - Select Edit HTML in the sub-menu at the top.
- Click "Download Full Template" and save the file somewhere convenient.

- Select the file on your harddrive by clicking "Browse" below:
Template Install
- Click once in the textfield above to select the converted HTML, then right-click to copy.
- Make sure all the text is selected in the Edit Template text box (see screenshot). You can press CTRL+A (Command+A on a Mac) to select all text.
Now paste the text you just copied! (Right-click in the field.)
-
Click "Save Template".
Congratulations! You have installed Intense Debate on your Blogger blog. Here's what you can do now:
this is the process. - Click once in the textfield above to select the converted HTML, then right-click to copy.
-
Subscribe to:
Posts (Atom)